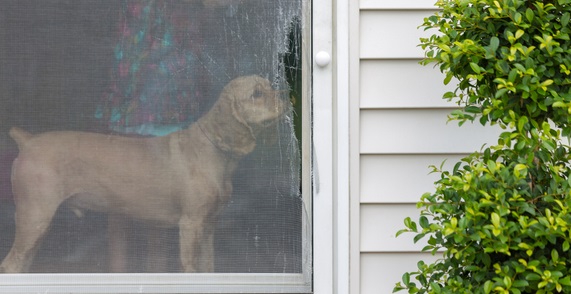
Our dog loved to jump up and scratch at the back door to be let in. It was becoming really annoying after a while as the screen door was getting more and more damaged from the constant clawing.
Now he was a young pup and they do tend to get excited. Through proper training you can eventually teach them not to do this.
The problem of course is what do you do in the meantime? And to be honest even the most well trained pup can occasionally still scratch on the door to come in.

We liked the idea of a screen door so that fresh air could circulate through the house – but replacing the screen doors on a regular basis wasn’t really a long term solution either as it can get quite expensive.
The ones I was looking at were between $100 to $200 or more depending on the features.
Even if you just had a normal door without the screens you would still have the problem of scratch marks all over the door – not a good look especially when guests come around.
Doggy Door?
Another possible solution was to install a doggy door but I wasn’t really sold on it for one main reason.
There would often be the occasional dog or cat from one of our neighbors that would stray into our yard.
You can bet they would also figure out how to use the doggy door as well as our pup – a menagerie of stray animals inside the house, especially when we were out, is not what we wanted.
Plus if you’re renting, it’s unlikely you’ll be able to put a hole in the door like that unless you have a really understanding landlord!
So a simpler, less damaging and more secure solution was needed.
I looked around at door protectors online but they were all ones that didn’t look very strong – plus they used adhesive tape or Velcro to attach them to the door which was never going to last long.
It would only be a matter of time before my dog would pull it down.
I was trying to think of a better solution to the problem and through some searching I came across this video which seemed to be a simple, straightforward idea that would solve the problem long term.
I’ve listed all of the supplies needed and the step by step instructions below the video..
Supplies Needed
Clear Polycarbonate Sheet 1/8” thick – Get the size that’s bigger than you need so you can cut it to just a little wider than the part of the door you want to protect.
Utility Knife (with new blade)
Flat Thick Cardboard
Drill
Screwdriver (hand or electric)
Self Tapping Screws
Plastic Washers
Pencil or Marking Pen
Step By Step Instructions
1. Measure the width of your screen door then add an extra 1 inch on each side so you can screw the sheet into the door frame.
2. Get a flat piece of cardboard (You can use an old large cardboard box and open it up which is what I did) and place it down on a hard surface such as a garden table or similar.
3. Place your polycarbonate sheet on the cardboard and using the Drywall T Square and a pencil, mark a line along your door width measurements on the polycarbonate sheet.
4. Using a utility knife (preferably with a new blade) and the T Square, score the sheet down the line. Make a few passes, starting from the top and moving down each time without pressing down too hard.
5. Turn over the polycarbonate sheet and do the same on the other side of the score lines you just made.
6. Place the polycarbonate sheet on a hard surface with the score marks along the edge. Place your hand on the sheet and snap the edge off.
If you find that it doesn’t snap off clean you can always use some pliers to break off any bits that remain.
7. Take the plastic off the sheet on each side then place the sheet in the desired location on your door.
8. Use a drill (with a bit size that allows the width of your tapping screws to go in) to put holes in each corner of the sheet. Then use a screwdriver to screw the tapping screws through the corner holes in the sheet and fasten it firmly to the door.
Some Key Points…
♦ Make sure not to screw down too far otherwise you will ruin the thread and the screws will become loose. You could also crack the polycarbonate sheet so I recommend also using plastic washers to protect the sheet from the head of the screws.
♦ You can also cut the sheet with a saw if you have one handy. I didn’t have one but I found this method was good enough and I got a reasonably straight edge in the finish.
♦ If you do have a saw you can still complete all the marking steps but once you’ve marked your line just saw all the way down and you’re done.
♦ We used this method to protect our wire screen door at the back and our metal screen door at the front from damage – but it can work for any type of door you have whether its wood, glass or metal.
The Final Result
So after completing all of the steps above this is what the finished product looks like on our front door:

I think it looks great – not too obtrusive that it stands out too much but great protection for the door..and it can easily be taken down if we need to in future.
We also did the same on our back door which is more of a fine wire screen mesh type…and it is also working well.
For those of you who want to try it, this will work for any type of door material that you want to protect from scratching, not just screen doors as shown in the video.
Let me know in the comments below if you have any questions or if you’ve tried it, let me how it all went. 🙂
Good luck!
Elise is the owner of HMD. She has spent her whole life around dogs starting from when she was growing up on her parents farm. She is a prolific writer and blogger who passionately writes about her love for her canine friends.
Love this easy to follow guide! Will be giving this idea a go this week. How much would it cost all up?
Hey Dominique,
It depends on how many of the supplies you have already. It’s certainly a lot cheaper than buying new screens every time your dog scratches through them ????